For Routers that Disable DNS Configuration
(Mac Only)
Instructions are specific to 2wire 3801HGV but can also be applied to NVG589, AT&T U-verse routers, and most other routers that don’t let you configure DNS
Save and change DNS server settings
- Connect your Mac to your AT&T U-verse router by using an ethernet cable. You may need an ethernet adapter to do this.
- Open your web browser and type in the url address listed on the side of your router. The url address should be on the side of the router next to “Advanced Configuration”.
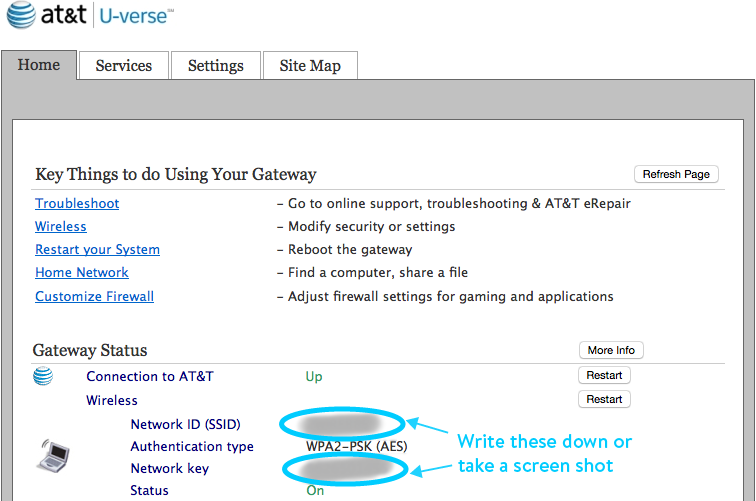
- This should bring you to the AT∓T U-verse page. If it asks for your password, your password should be the numbers listed after “Device Access Code”.
- Write down or take a screenshot of your Network ID (SSID) and Network key.
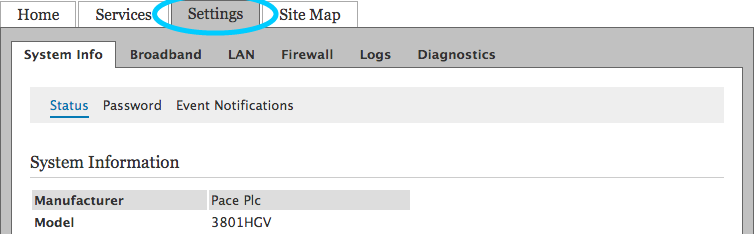
You will need these for later. - Click on the Settings tab
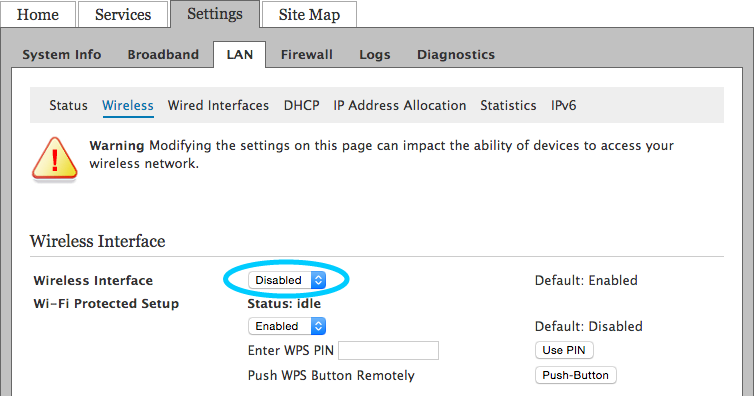
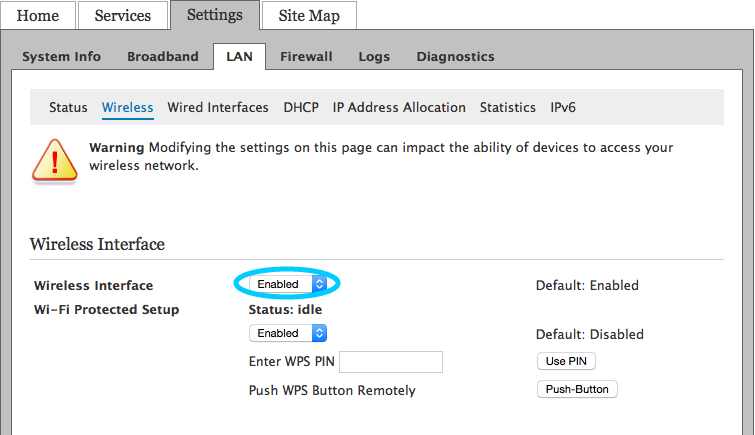
- Click on the LAN tab and Wireless
- Change “Wireless Interface” from Enabled to Disable and then press save.
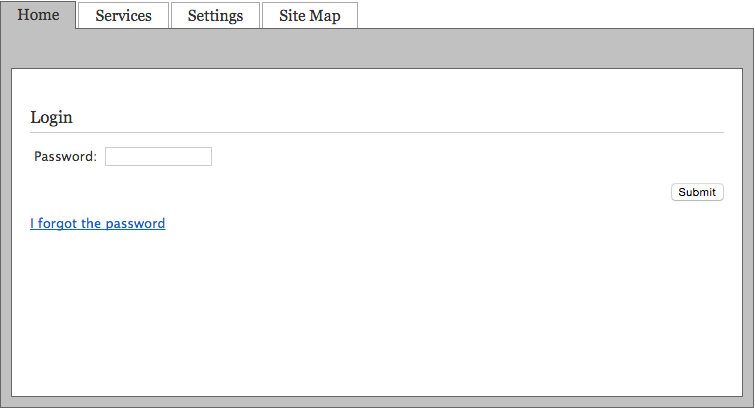
- Type in your router password in the login screen. Your default router password is located on the side of your router next to “Device Access Code”
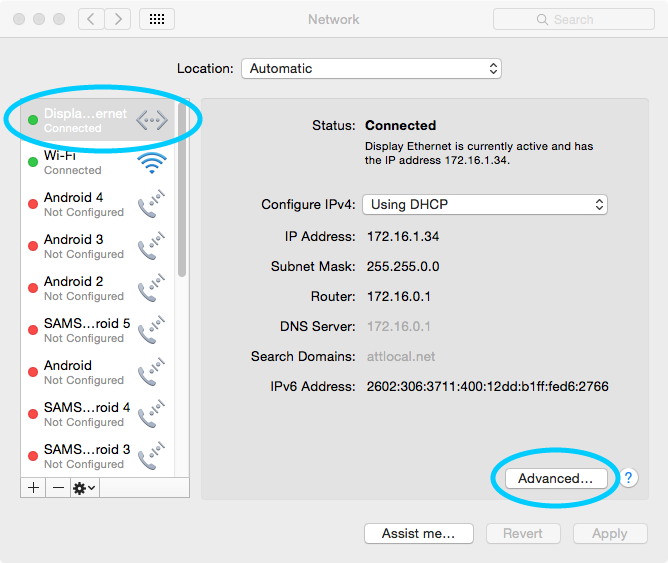
- Go to Apple, System Preferences and click on the Network Icon
- Select Ethernet from the Left Menu and click Advanced on the bottom right
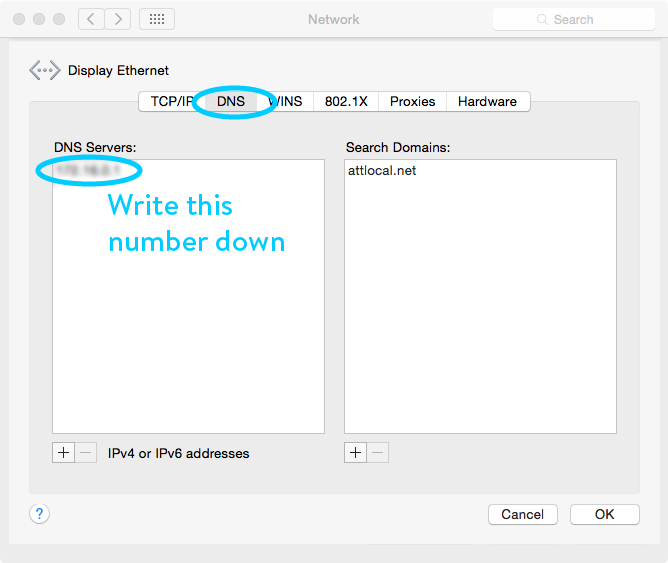
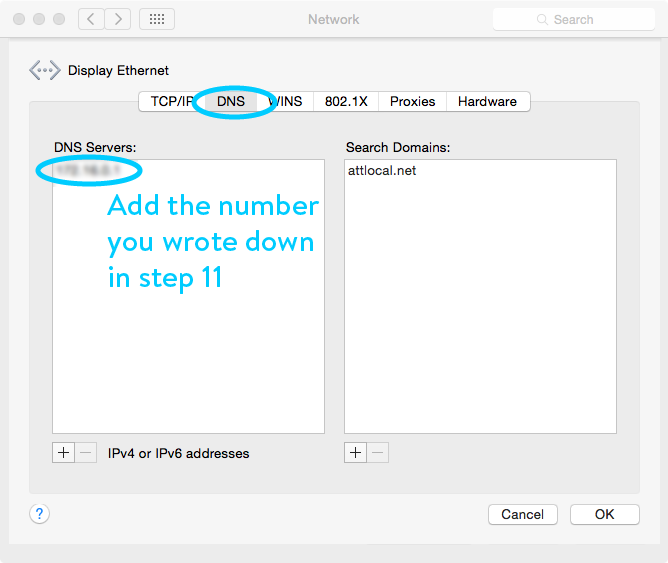
- Click on DNS at the top, and write down the numbers under DNS server. You will need these for later.
- Remove all current numbers by selecting and pressing “-”
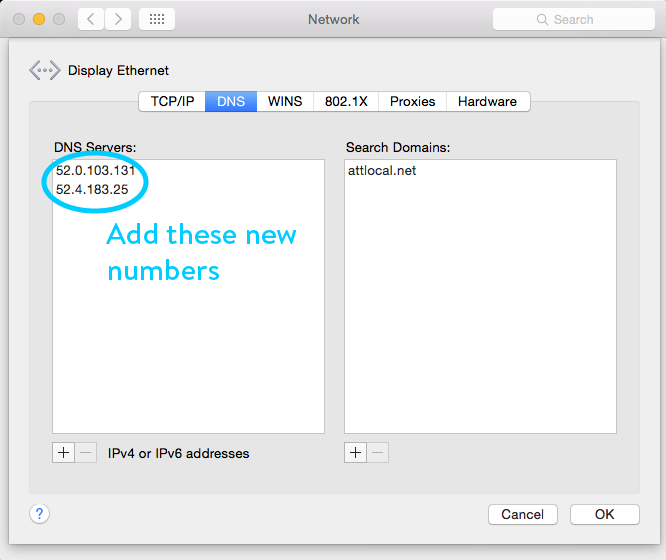
- Press “+” to add new DNS numbers 52.0.103.131 and 52.4.183.25
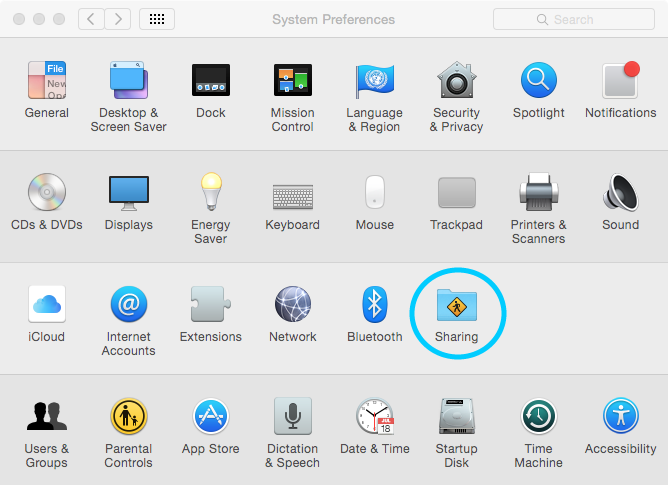
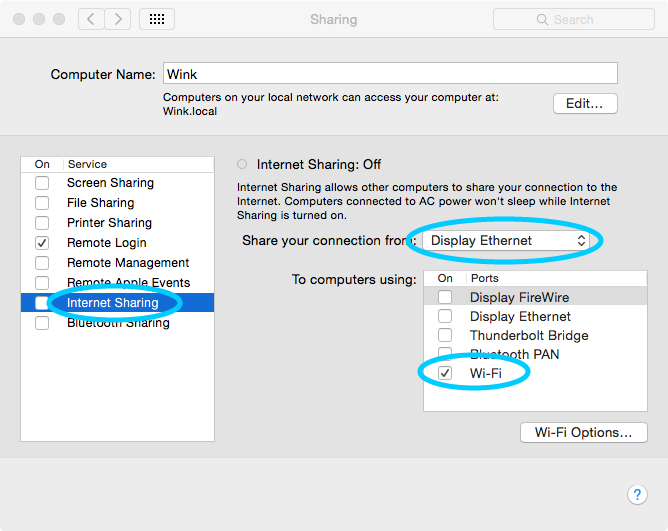
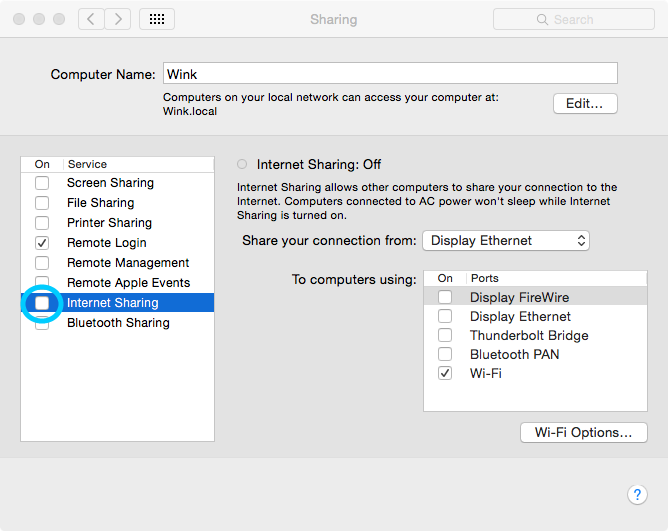
- Go to System Preferences and press the Sharing Icon
- Highlight “Internet Sharing” (but do not click the checkmark), select “Display Ethernet” and click the checkbox for Wi-Fi
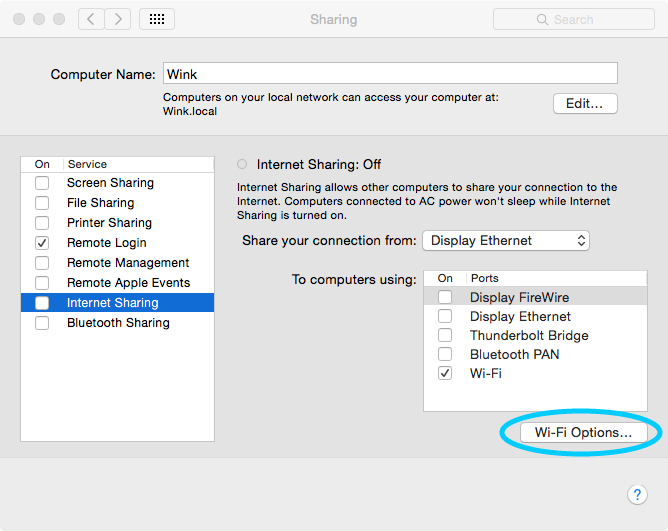
- Click Wi-Fi Options in the bottom right corner
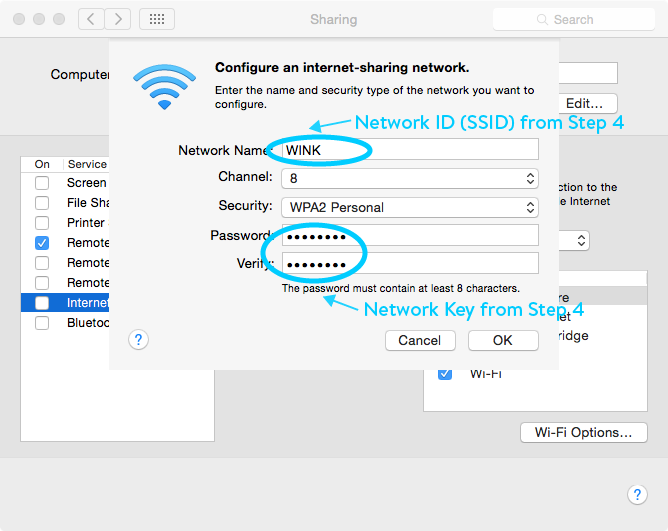
- When it prompts you for Network Name and Password, type in the Network ID (SSID) and Network Key that you wrote down in Step 4, and click “OK”.
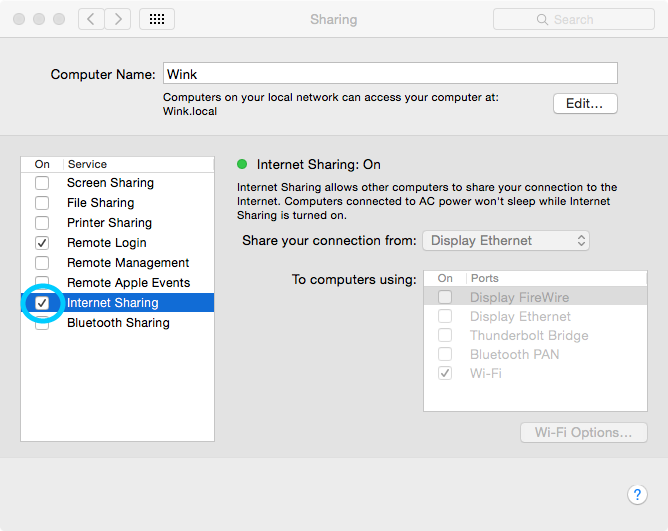
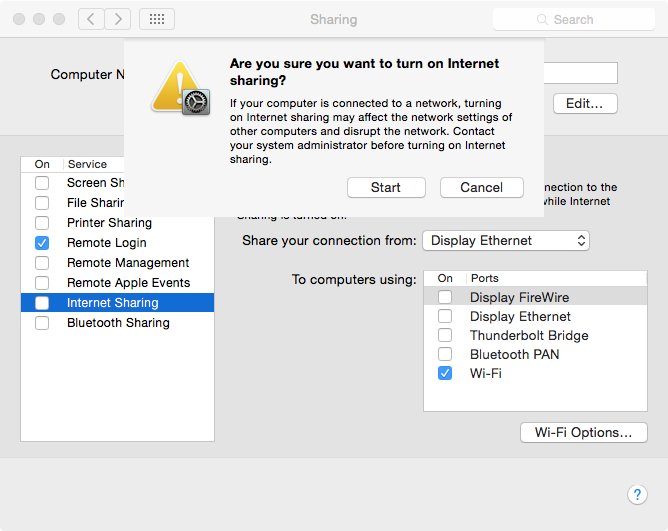
- Click checkbox next to “Internet Sharing”
- Press “Start” when you are prompted by the dialog box


Reboot and update your Hub
- Reboot your Hub by unplugging it and plugging it back in.
- Your Hub light will flash a series of different colors and should turn either solid blue or blinking purple within about 10 minutes.
- Solid Blue: Continue on to step 3
- Blinking Purple: Open the Wink app on your smartphone and tap “Add a Product,” then follow the steps to connect Wink Hub. Be sure to return here to finish these steps.
- Solid Yellow: Your Hub is connected to your network, but not the internet. If it’s been solid yellow for a few minutes, you might need to power-cycle the Hub. If it’s still stuck on solid yellow, make sure your DNS configuration is correct, or give us a call.
- Once the update is finished, confirm that the Hub firmware is on 0.86.0 by going into your Hub settings page in the Wink app.
Revert back to original DNS server settings
- Turn off internet sharing by unchecking the box next to “Internet Sharing”
- Go to System Preferences and press the Network Icon
- Click on Display Ethernet > Advanced > DNS (See steps 9 -11 above for screenshots of how to get here)
- Delete the current DNS server address and add the DNS server address you wrote down in step 11
- Go back to the AT&T U-verse page in your web browser and set the Wireless Interface to be ‘Enabled’
- When you are prompted for your password, type in the numbers written on your router after “Device Access Code”
- You might need to reboot your Hub by unplugging it and plugging it back in to reconnect to your original Wi-Fi network.
Verify that your Hub works
- Try controlling something from the Wink App. If it works, then you’re all set!
- If you’ve been able to recover your Wink Hub and no longer need to ship back your Hub for repair, please let us know so that we can cancel the box shipment.